
Read The Docs for REST APIs Made Simple, Part 1
While developing software, documentation is frequently the furthest thing from a programmer’s mind. Writing documentation can be tedious and, well let’s just say it, downright boring. But these days, open platforms supporting public APIs are proliferating and their success depends heavily on how easy it is to use these APIs. There’s no getting around it, if you have created an API for your service that you want your customers to adopt, you have to have good documentation for it.
I’ve written a lot of documentation in my day, and continue to do so, using various tools like emacs, Word, PowerPoint, Confluence, etc. My favorite though is Read The Docs. With it you can create visually attractive and well organized documents with (relatively) simple textual directives that can produce HTML and PDF copy for online presentation.
This blog is part 1 of a 2 part series which illustrate how to create a simple Read The Docs online document ib HTML and PDF formats. In part 1, I’ll cover making a basic document from scratch that will form the basis for the project you’ll flesh out in parts 2.
Install Sphinx
The key to harnessing Read The Docs is getting your head wrapped around the reStructured Text (RST) format. RST is a form of text markdown that provides directives to help you organize and format your document using a simple text editor. To create a document with a set of RST files, you use the Sphinx compiler.
Let’s get started with Sphinx by creating a starter project that will be built out into a full-fledged REST API document. Sphinx is Python based tool, so you will have to have Python running on your system. Create the project directory then install Sphinx in a Python virtual environment:
% mkdir starterdoc
% cd starterdoc
% pip install pipenv
% pipenv shell
(starterdoc) % pip install sphinx
Create Your First Document
Next create the starter project base documents, run the sphinx-builder command, answering the questions that follow it. You can use your own name when prompted for the document author in line 16.
1
2
3
4
5
6
7
8
9
10
11
12
13
14
15
16
17
18
19
20
21
22
23
24
25
26
27
28
29
30
31
32
33
34
35
36
37
(starterdoc) % sphinx-builder restdoc
Welcome to the Sphinx 2.3.1 quickstart utility.

Please enter values for the following settings (just press Enter to
accept a default value, if one is given in brackets).

Selected root path: restdoc

You have two options for placing the build directory for Sphinx output.
Either, you use a directory "_build" within the root path, or you separate
"source" and "build" directories within the root path.
> Separate source and build directories (y/n) [n]: y

The project name will occur in several places in the built documentation.
> Project name: Rest API
> Author name(s): Vic Hargrave
> Project release []: 0.1

If the documents are to be written in a language other than English,
you can select a language here by its language code. Sphinx will then
translate text that it generates into that language.

For a list of supported codes, see
https://www.sphinx-doc.org/en/master/usage/configuration.html#confval-language.
> Project language [en]:

Creating file restdoc/source/conf.py.
Creating file restdoc/source/index.rst.
Creating file restdoc/Makefile.
Creating file restdoc/make.bat.

Finished: An initial directory structure has been created.

You should now populate your master file restdoc/source/index.rst and create other documentation
source files. Use the Makefile to build the docs, like so:
   make builder
where "builder" is one of the supported builders, e.g. html, latex or linkcheck.
The directory structure of the starterproject will look like this:
.
├── Pipfile
├── Pipfile.lock
└── restdoc
    ├── Makefile
    ├── build
    ├── make.bat
    └── source
        ├── _static
        ├── _templates
        ├── conf.py
        └── index.rst
The files you edit to create your document are contained in the restdoc/source directory. To build your first document, run these commands:
(starterdoc) % cd restdoc
(starterdoc) % make clean html
The structure of the restdoc directory is populated with all the necessary base files to create an empty online document:
.
├── Makefile
├── build
│   ├── doctrees
│   │   ├── environment.pickle
│   │   └── index.doctree
│   └── html
│       ├── _sources
│       │   └── index.rst.txt
│       ├── _static
│       │   ├── alabaster.css
│       │   ├── basic.css
│       │   ├── custom.css
│       │   ├── doctools.js
│       │   ├── documentation_options.js
│       │   ├── file.png
│       │   ├── jquery-3.4.1.js
│       │   ├── jquery.js
│       │   ├── language_data.js
│       │   ├── minus.png
│       │   ├── plus.png
│       │   ├── pygments.css
│       │   ├── searchtools.js
│       │   ├── underscore-1.3.1.js
│       │   └── underscore.js
│       ├── genindex.html
│       ├── index.html
│       ├── objects.inv
│       ├── search.html
│       └── searchindex.js
├── make.bat
└── source
    ├── _static
    ├── _templates
    ├── conf.py
    └── index.rst
The base document HTML is contained in build/html. The html/index.html is the root page, which is built from source/index.rst. To view the HTML document just open it in a browser:
(starterdoc) % open build/html/index.htmlYour first document should look like the following:
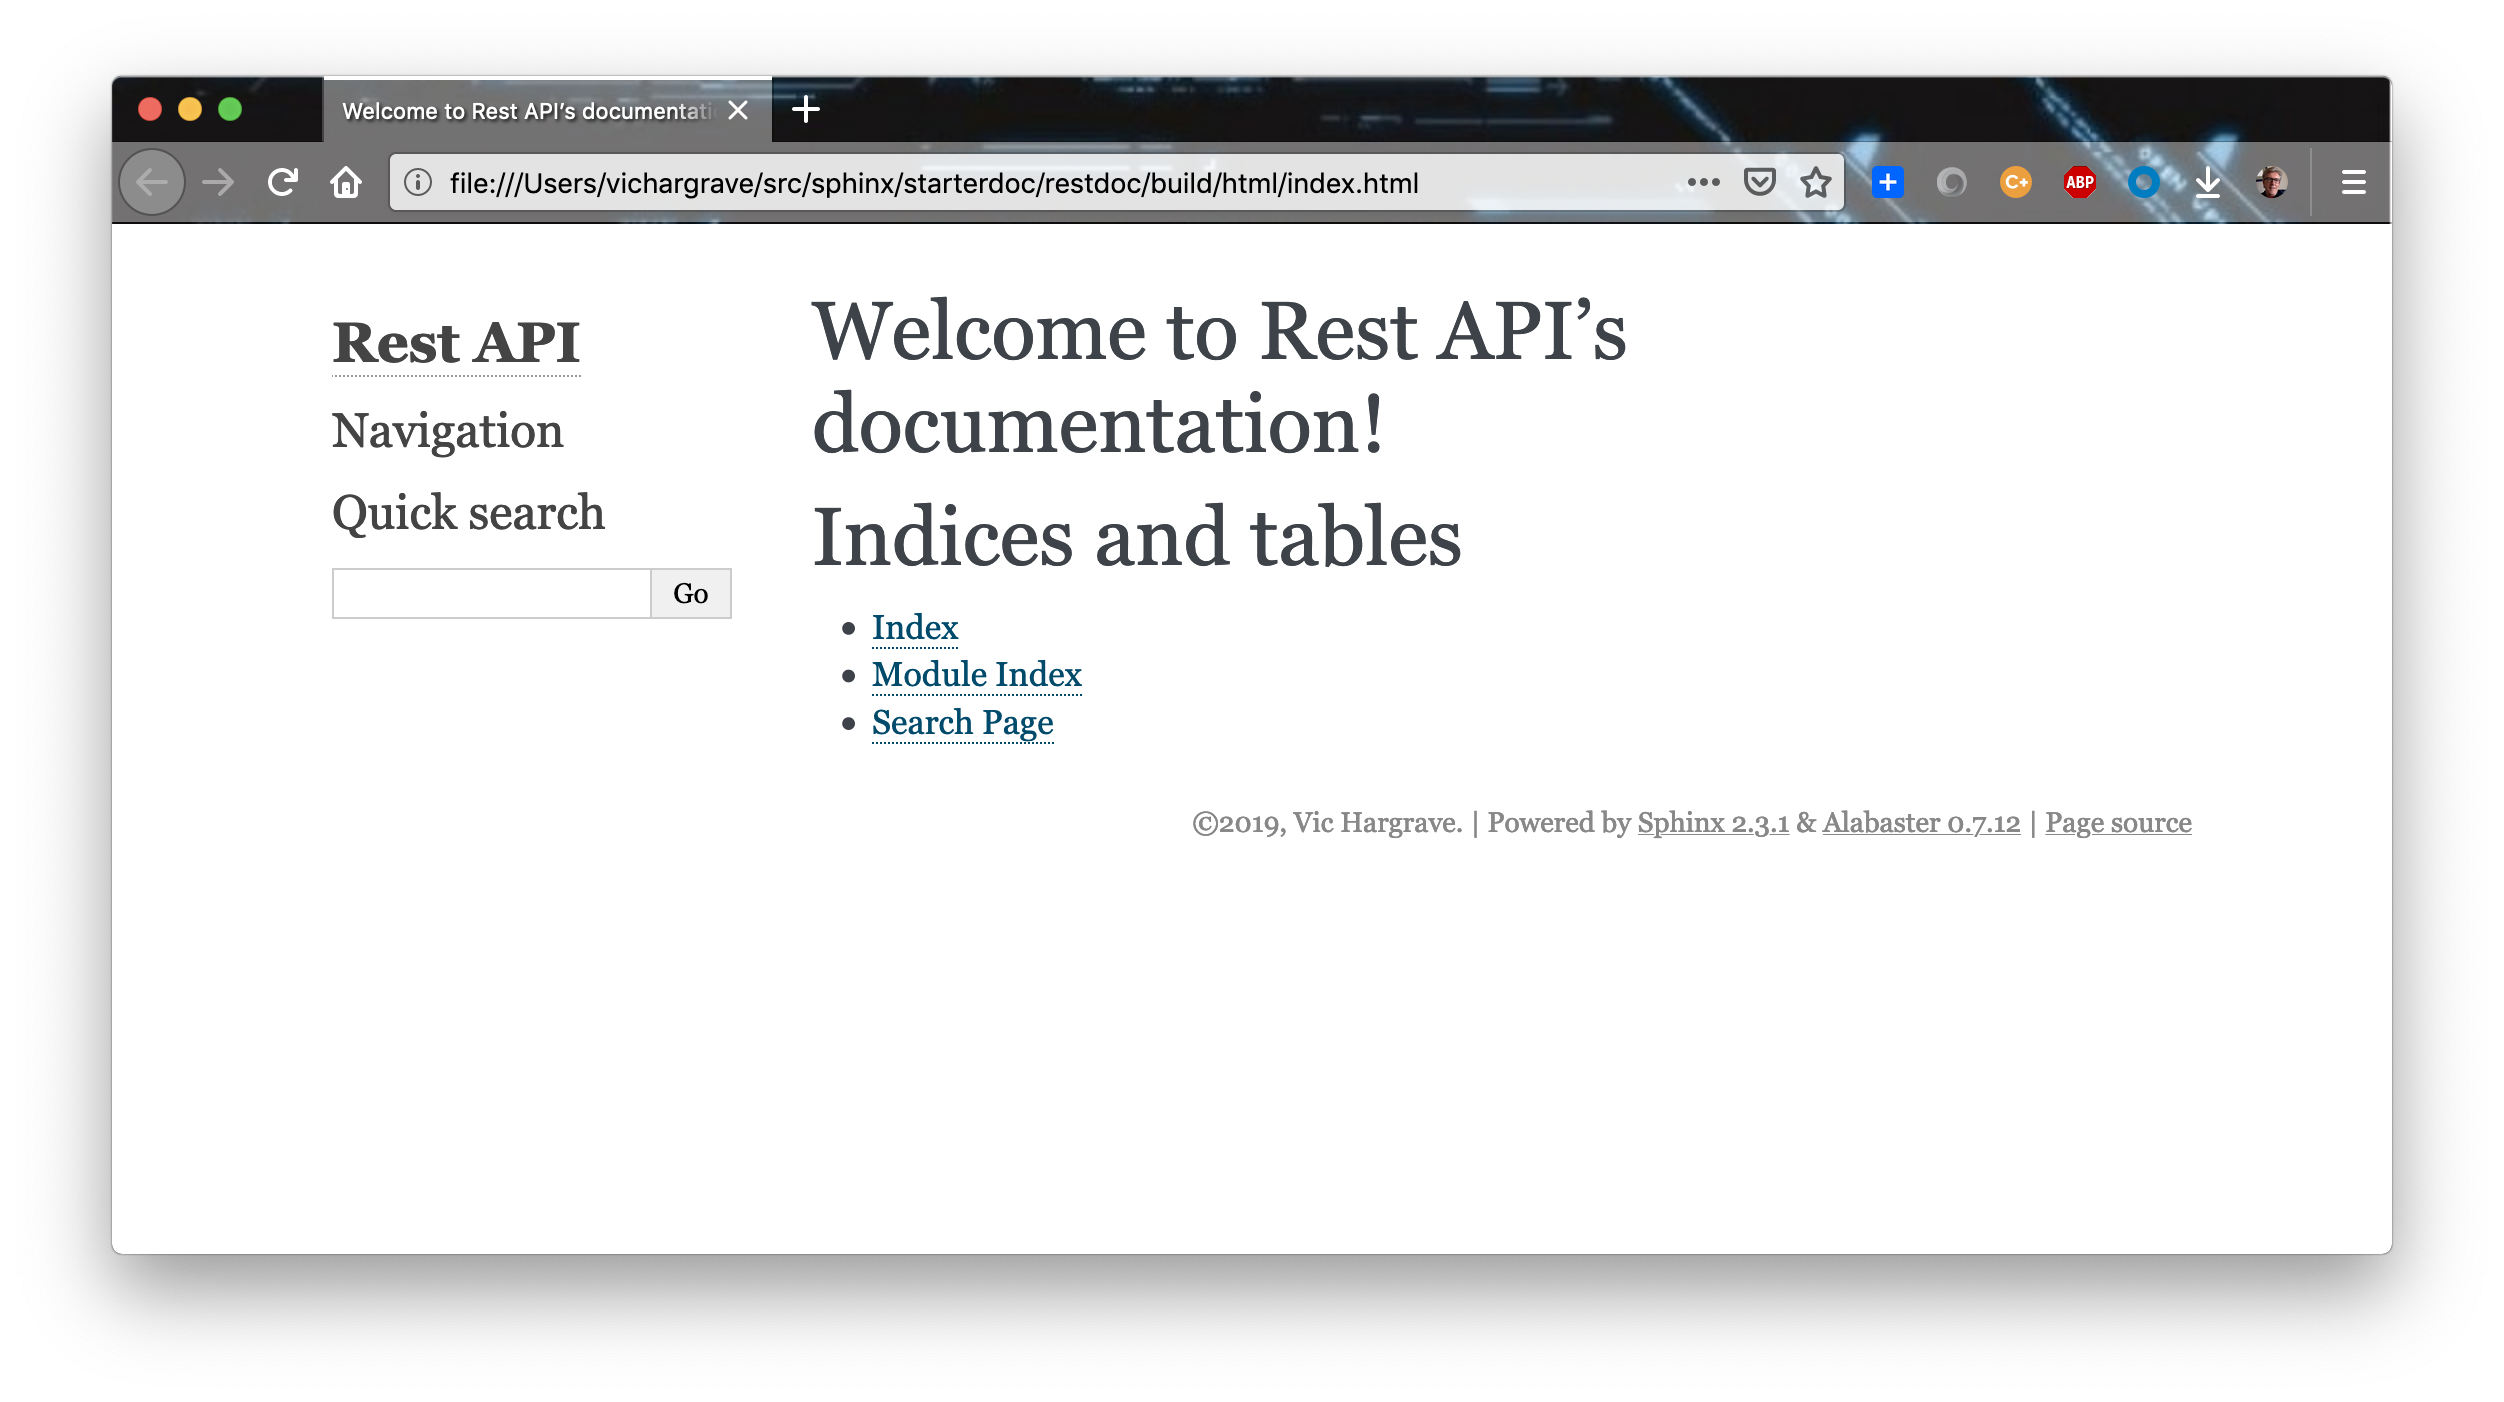
Sphinx does more than just convert the RST files to HTML. In addition to nicely formatted HTML, you also get a search tool right of the box that lets you search for terms in your document without having to add code.
Add a Table of Contents
Now you have a basic document that you can edit to your liking. The RST for the table of contents is contained in the source/index.rst:
1
2
3
4
5
6
7
8
9
10
11
12
13
14
15
16
17
18
19
20
.. Rest API documentation master file, created by
   sphinx-quickstart on Wed Dec 25 11:21:59 2019.
   You can adapt this file completely to your liking, but it should at least
   contain the root `toctree` directive.

Welcome to Rest API's documentation!
====================================

.. toctree::
   :maxdepth: 2
   :caption: Contents:


Indices and tables
==================

* :ref:`genindex`
* :ref:`modindex`
* :ref:`search`
Section headings are denoted by a series of = characters under the heading text. This is true for any Sphinx page. The table of contents is designated with the .. toctree:: line. There are 3 sections in this file:
- Comments at the top, lines 1 - 5
- Table of contents in the middle, lines 6 - 14
- Index section at the bottom, lines 15 - 20
You don’t need the top and bottom sections for this project so just remove them. Also remove the :caption: Contents: line, and change the title to REST API Document. At this point, the index.rst file should look like this:
Rest API Document
=================

.. toctree::
   :maxdepth: 2
For each page that you want add to your document, you add a corresponding item under the :maxdepth: 2 line. The name of a table of contents item must be the same as the name of the RST file containing the page content minus the .rst extension. The document you are going to create consists of two pages called retrieve and forms. Add these items to the table of contents in index.rst.
Rest API Document
=================

.. toctree::
   :maxdepth: 2

   retrieve
   forms
When the document is built again, Sphinx automatically sets up links to retrieve.rst and forms.rst files.
Add Pages to the Document
To keep things simple at this stage, you can just add headings to the retrieve.rst and forms.rst files, again underlining the heads with = characters. You’ll add more content later in Part 2 of this series. The contents retrieve.rst and forms.rst files, respectively, should looks like this:
Retrieve API
============
Forms API
=========After building the document again, open it in your browser:
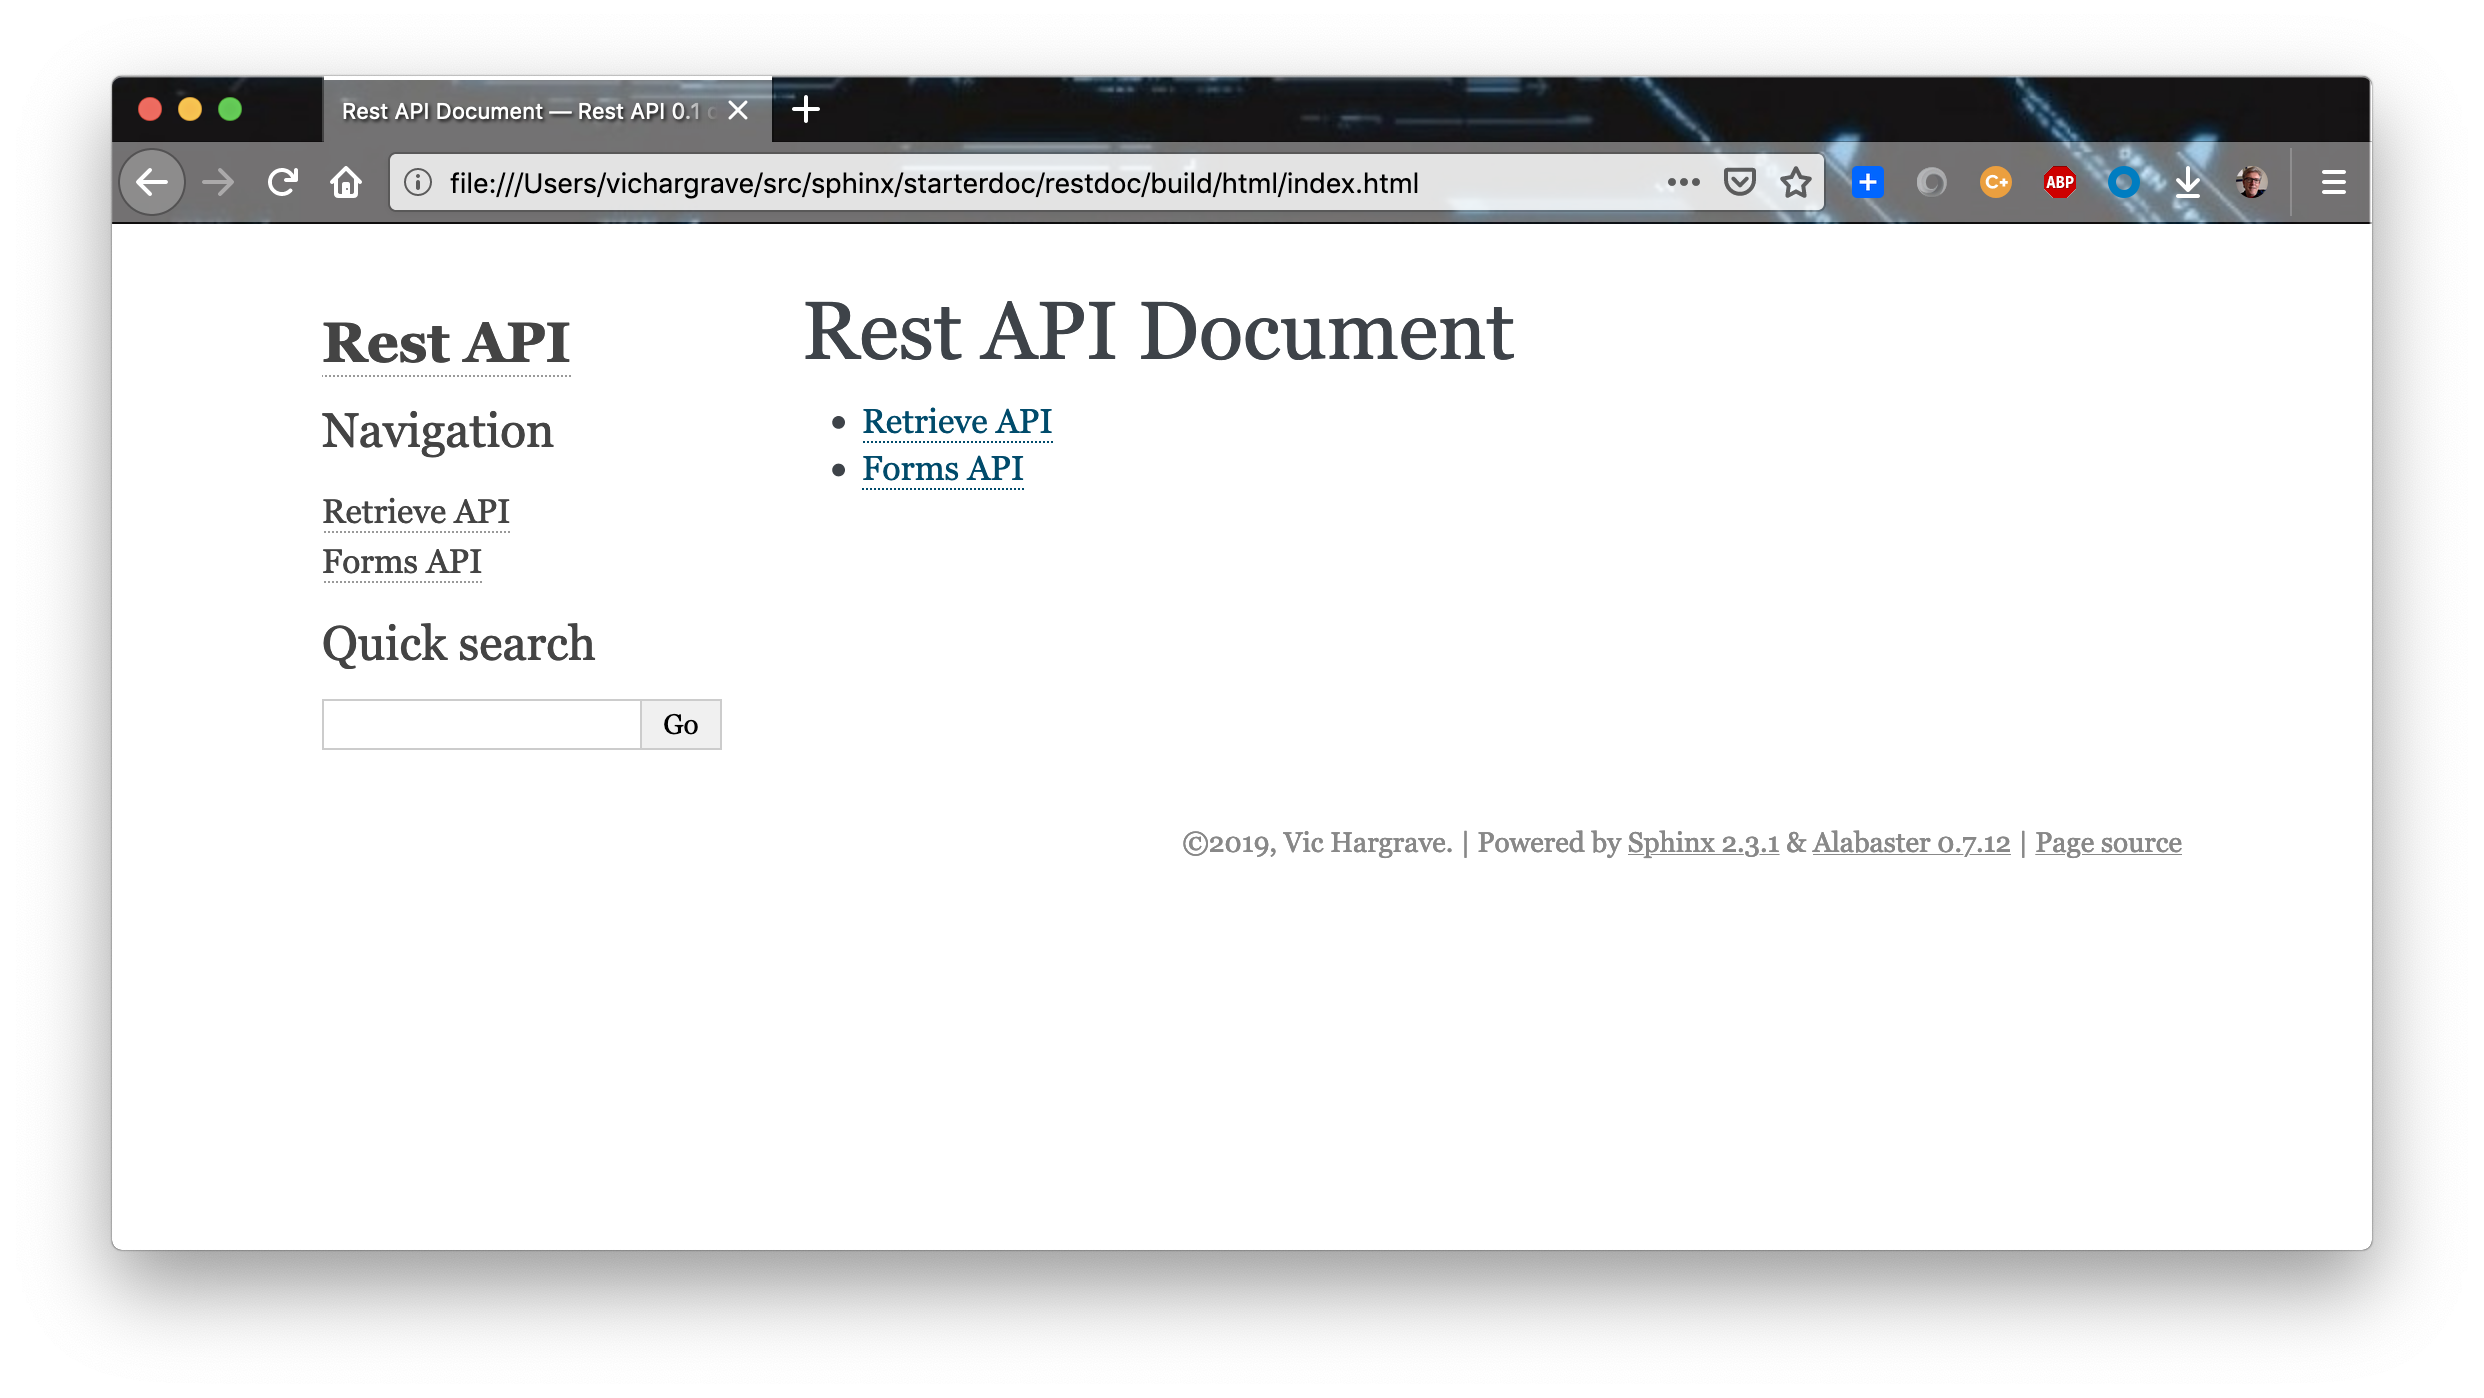
Now you have two links in your table of contents that will open their respective pages when clicked upon.
Next Steps
In this blog you were introduced to the process of creating a basic Sphinx project and how to generate your first document. You were able to easily create a table of contents and add pages, that were automatically indexed for you by Sphinx. Part 2 of this series will delve more deeply into the Sphinx facitlties and syntax you can use to describe REST APIs in detail.


Leave a comment